


In the ever-evolving world of technology, setting up and installing software or systems on specific servers is a critical task for developers, system administrators, and IT professionals. The keyword “http://164.152.29.41:install” suggests a focus on the installation process for a system or application hosted at the IP address 164.152.29.41. This blog post aims to provide a comprehensive guide to understanding and navigating the installation process for systems associated with this IP address, covering key concepts, steps, best practices, and potential challenges. Whether you’re a beginner or an experienced professional, this guide will offer valuable insights into ensuring a smooth installation.
What Does “http://164.152.29.41:install” Represent?
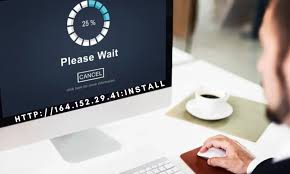
The URL “http://164.152.29.41:install” likely points to a specific resource, such as a web page, documentation, or an installation script, hosted on a server with the IP address 164.152.29.41. The “:install” portion could indicate a specific endpoint, directory, or page dedicated to guiding users through the setup or installation of a software application, service, or system. This IP address could be associated with a variety of services, such as a web server, a database, a cloud-based application, or even a custom-built system for a specific organization.
Before diving into the installation process, it’s essential to understand the context of the IP address and the service it hosts. The IP 164.152.29.41 is a public IP address, meaning it’s accessible over the internet. However, without specific details about the service or application, we’ll approach this guide generically, focusing on common installation scenarios for web-based applications or servers. If you’re working with a specific system tied to this IP, you may need to consult the official documentation or contact the server administrator for precise instructions.
Preparing for Installation
1. Verify the IP and Service
Before attempting any installation, confirm that the IP address 164.152.29.41 is correct and accessible. You can do this by:
- Pinging the IP: Open a terminal or command prompt and type ping 164.152.29.41 to check if the server is reachable.
- Accessing the URL: Enter http://164.152.29.41:install in a web browser to see if it loads a webpage or prompts a download. If it’s a private server, you may need credentials or VPN access.
- Checking Documentation: Look for any official documentation or README files associated with the service. These are often linked on the installation page or provided by the service provider.
2. Gather Prerequisites
Most installation processes require specific tools, dependencies, or configurations. Common prerequisites include:
- Operating System: Ensure your system (Windows, Linux, macOS) is compatible with the software.
- Dependencies: Install required software libraries or frameworks (e.g., Python, Node.js, Java, or specific databases like MySQL or PostgreSQL).
- Access Credentials: You may need SSH keys, API tokens, or login credentials to access the server or download installation files.
- Hardware Requirements: Verify that your system meets the minimum CPU, RAM, and storage requirements.
- Network Access: Ensure you have a stable internet connection and that any firewalls or security groups allow access to 164.152.29.41.
3. Secure Your Environment
Security is paramount when installing software from an external server. To protect your system:
- Verify the authenticity of the IP address and the installation package. Avoid downloading files from untrusted sources.
- Use HTTPS if available (though the keyword specifies HTTP, check if a secure version exists).
- Back up your system before proceeding with any installation.
- Run installation commands in a controlled environment, such as a virtual machine or container, to minimize risks.
Step-by-Step Installation Process
Assuming the URL “http://164.152.29.41:install” provides access to an installation script, package, or guide, here’s a generalized step-by-step process for installing a web-based application or server software. Adjust these steps based on the specific instructions provided by the service.
Step 1: Access the Installation Resource
Visit http://164.152.29.41:install using a web browser or a tool like curl or wget. For example:
curl http://164.152.29.41:installThis command may display a webpage, download a file, or return a script. If it’s a webpage, follow the instructions provided. If it’s a downloadable file (e.g., .zip, .tar.gz, or a script like install.sh), save it to your system.
Step 2: Download and Extract Files
If the URL provides a downloadable package, save it to a secure directory. For example:
wget http://164.152.29.41:install/install.tar.gz
tar -xvzf install.tar.gz
This extracts the contents of the archive. Review the extracted files for a README or INSTALL file, which typically contains specific installation instructions.
Step 3: Install Dependencies
Most applications require dependencies to function correctly. If the installation page or documentation lists required libraries or tools, install them. For example, on a Linux system, you might run:
sudo apt-get update
sudo apt-get install python3 python3-pip nodejs npm
For specific dependencies, follow the instructions provided. For instance, if the application uses Python, you might need to install packages listed in a requirements.txt file:
pip3 install -r requirements.txtStep 4: Configure the Environment
Some installations require environment variables or configuration files. Check for files like .env, config.json, or settings.py. For example, you might need to set database credentials or API keys:
export DATABASE_URL="mysql://user:password@localhost/dbname"Follow the documentation to configure ports, paths, or other settings specific to the application.
Step 5: Run the Installation Script
If the URL provides an installation script (e.g., install.sh or setup.py), execute it with appropriate permissions:
chmod +x install.sh
./install.sh
For Python-based applications, you might run:
python3 setup.py installFollow any prompts or instructions provided by the script. Be cautious when running scripts, and review their contents to ensure they’re safe.
Step 6: Verify the Installation
After installation, verify that the application or service is running correctly. For web applications, this might involve accessing a URL like http://164.152.29.41 or http://localhost:port. For example:
curl http://164.152.29.41If the service is running locally, start it using the provided command (e.g., npm start, python3 app.py, or systemctl start service-name). Check logs for errors if the service doesn’t start as expected.
Step 7: Test and Troubleshoot
Test the application’s functionality to ensure it works as intended. Common tests include:
- Accessing the web interface (if applicable).
- Running sample commands or API calls.
- Checking logs for errors (e.g., /var/log/app.log or journalctl -u service-name).
If you encounter issues, consult the documentation, check error messages, or search for solutions online. Common problems include missing dependencies, incorrect configurations, or network issues.
Best Practices for a Successful Installation
To ensure a smooth installation process, follow these best practices:
- Read the Documentation: Always start with the official documentation or README file. It provides specific instructions tailored to the application.
- Use Version Control: If the installation involves code, clone the repository using Git to track changes and roll back if needed.
- Automate Where Possible: Use tools like Ansible, Docker, or Kubernetes to automate installations and ensure consistency.
- Monitor Resource Usage: Keep an eye on CPU, memory, and disk usage during installation to avoid performance issues.
- Test in a Staging Environment: Install and test the application in a non-production environment before deploying it live.
- Keep Security in Mind: Regularly update the software and dependencies to patch vulnerabilities.
Common Challenges and Solutions
Challenge 1: Connection Issues
If you can’t access http://164.152.29.41:install, check your network connection, firewall settings, or whether the server is online. Use tools like traceroute or telnet to diagnose connectivity issues.
Challenge 2: Missing Dependencies
If the installation fails due to missing libraries, carefully review error messages and install the required packages. For example, on Linux, use apt, yum, or dnf to install missing software.
Challenge 3: Configuration Errors
Incorrect configuration settings (e.g., wrong database credentials) can cause the application to fail. Double-check all configuration files and environment variables.
Challenge 4: Permissions Issues
If you encounter “Permission denied” errors, ensure you have the necessary privileges. Use sudo for administrative tasks or adjust file permissions with chmod and chown.
Conclusion
Installing software or systems hosted at an IP address like 164.152.29.41 requires careful preparation, execution, and verification. By following the steps outlined in this guide—verifying the IP, gathering prerequisites, securing your environment, and carefully executing the installation—you can set up the application successfully. Always refer to the official documentation for specific instructions and troubleshoot issues methodically.